BACKUP - INSTALL ( RESTORE ) TEMPLATE & CONTENT
1. Getting Started
To install this Blogger template you must have an account on Blogger. First login to your blogger dashboard using your existing gmail account if you have already one or you can start to create your own account by visit Blogger.com or blogspot.com and login using your existing gmail account. Once you’ve done, you can start to begin a very basic configuration.
It’s important for you to backup your previous data: template, widgets, and content.
By doing a backup, you can restore the data anytime.
1Backup Template
Login to your Blogger. Click “Theme”.
Click the “down arrow” on CUSTOMIZE button.


BACKUP CONTENT
2Backup Content
Click to “Settings”
Scroll-down to “Manage Blog” section.
Click “Backup Content” as shown below.

Click DOWNLOAD

Click “Save File”.

INSTALL/RESTORE TEMPLATE
Theme → Restore → Upload


BLOG LAYOUT

DROPDOWN MENU
Go to ‘Layout’ > click ‘Edit’ on Menu Page gadget link icon.

1. For adding a static page as a single menu tab(without dropdown menu)
IMPORTANT!Pages should be already have created and published .Click on “ADD A NEW ITEM”
Click on “Page name” then pages you’ve created will be listed .
Choose the page you want to display on Menu Tab and click on save.

2 . For adding label or category as a single menu tab(without dropdown menu)
Fill out the fields ‘Page name’ and ‘Page URL’ as explained below:
Page name – type the title of the tab exactly as you want it to appear in the menu
Page URL – add the following link structure in the field:
/search/label/LabelName
Note: Replace LabelName with the name of your label and make sure that it exactly the same as the label in your post.

After filling out the fields, click on “Save” button.

Creating a Drop-Down Menu
1 . Adding Labels as drop-down menu tabs
Order does matter here.
Subelements for the second level start with an _and elements of the third level, start with two underscores __ For the correct order, you need to put the grandchildren underneath the children and the children below the parent.

go to LAYOUT > MENU > click on Edit link icon. >click on ‘ADD A NEW ITEM’.
Fill out the fields as explained below:
- Page Name – type the title of the tab exactly as you want it to appear in the menu and add one underscore _ in front of it. The underscore will not be visible in the menu.
- Page URL – Add the link (it can be the link to a static page, a label page or to another website).
This is how it should look like after filling out the fields:

Click “Save Link”.
For showing the sub categories or sub labels or sub pages under a specific menu tab (Parent-link) ( such as Categories etc.), all page titles with underscore “_” should be placed under the specific menu tab .
For example, if I want to show the “The Journals” and “Scripts” labels
under the “Categories” drag and drop them below the Categories tab. (shown as below ).
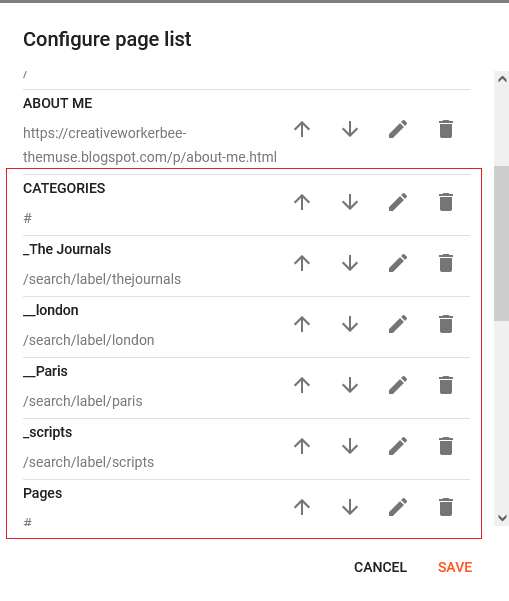
Elements of the third level, start with two underscores __ For the correct order, you need to put the grandchildren underneath the children and the children below the parent.
2 . Adding static pages as drop-down menu tabs
go to LAYOUT > MENU > click on Edit link icon. >click on ‘ADD A NEW ITEM’.
Click on “Page name” then pages you’ve created and its page url’s will be listed .
Choose the page you want to display on Menu Tab as a child menu item and add one underscore _ in front of it .
Elements of the third level, start with two underscores __ For the correct order, you need to put the grandchildren underneath the children and the children below the parent.
If you have finished adding all the child and grandchild pages under the parent menu tab click the ‘Save’ button .

CONFIGURE BLOG HEADER
How to add Header image (logo/banner)
– Blog header font is not included to downloaded template file from etsy but
if you write your blog title to ‘note to seller’ section or if you contact me via Etsy I can create your blog header image for you as you’ve seen in demo templates you’ve purchased.
-Go to Layout page in your dashboard and click Edit button on the Header gadget:


-Select your new header image file from your computer by using the “Browse…” button or input image URL.
– Click the “Save” button
CONFIGURE BLOG POST
Go to layout>Blog Posts>Edit


ABOUT ME GADGET
1ABOUT ME GADGET


- Title – The title for the About me Gadget will be shown above your profile picture.
- Caption (optional)– Here you can describe yourself or your interests in a few words.What you type will be displayed under the picture.It is optional ,no description will appear under your photo if you leave it blank.
- Link (optional) –When your photo is clicked, it links to the externel page.This page can be either a Page on your blog (such as the “About Me” page) or an external site (such as your facebook profile etc…)
- Image –You can choose to click the Browse… button or enter your image URL to upload your photo from your computer.

When you upload your profile photo it becomes automatically round.
INSTAGRAM GADGET
4INSTAGRAM GADGET ON THE SIDEBAR SECTION
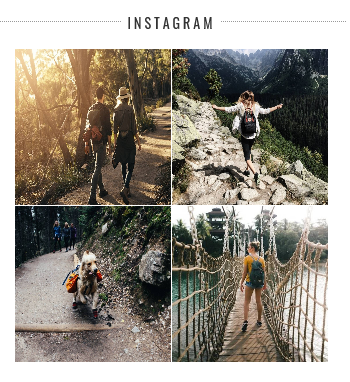
I’ve chosen free grid instagram feed design .
- Thumbnail Size: 150
- Layout (Columns X Rows) — 2 X 2
- Photo Border: No
- Photo Padding — 1 px
- Hover Effect — None
- Sharing Buttons — No
- Responsive — Yes


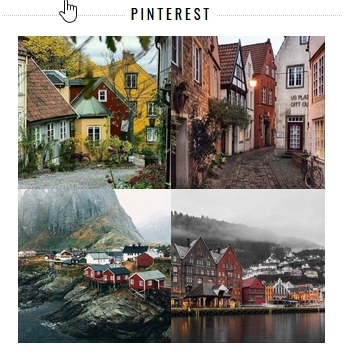
PINTEREST GADGET
5PINTEREST GADGET


CATEGORIES GADGET
6CATEGORIES GADGET

DISABLE NAVBAR GADGET
Go to layout>Navbar>Edit


FOOTER PAGE MENU GADGET

Go to layout>Footer Pages Gadget>Edit

Pages must have been already created and also published.

CUSTOMISE THE TEMPLATE ( TEMPLATE DESIGNER )
Blogger Dashboard>Theme >Customise>
On the left sidebar
SOCIAL MEDIA GADGET